Enjoy preserving the beauty and integrity found in everyday farm life and artisan farm based products.
Thursday, June 30, 2011
Goat Milk Gouda
Unlike many fancy European cheeses the cheeses of Holland are pleasingly mild. Gouda has a light clean buttery taste that everybody seems to love. When you're in the mood for something different hot pepper flakes or caraway seeds offer just two variations of this agreeable cheese.
If you are just getting started with cheese making you’ll notice that all recipes basically have the same ingredients, Milk, Rennet, Salt (or brine) and either Mesophilic (requires low temps) or Thermophilic (requires warmer temps) Culture.
For any recipe you can substitute Buttermilk for Meso and Yogurt for Thermo at a rate of 1/4c per gallon of milk. After you master the recipe you can order the more sophisticated cultures and enjoy the difference in flavor and texture.
What makes different types of cheese have their characteristic flavors is the process you take it through. Changing temperatures and times will make a huge difference in flavor and texture. Gouda is a mild, creamy cheese. To achieve proper texture you need to keep your temps low. So watch it really watch it close. To attain that mild Gouda flavor you will wash the curds with cool tap water to halt the progress of acidification.
Remember to sterilize everything with boiling water and/or bleach water (1/4 c bleach per gallon of water) I put everything into my cheese pot (stainless steal, not aluminum) and boil it. You can maintain low temps by placing your cheese pot in a sink of warm water but always check the temp of the sink water. I start with it 3-5 deg. Warmer that I need. So for this recipe which calls for 85* my sink water would be 90* This all sounds a lot more complicated than it is, I promise!
Goat Milk Gouda
Warm 2 gal goat milk to 85*
Add 1/2 tea Mesophilic culture. Stir with an up and down motion, not breaking the surface of the milk
Dilute 3/4 tea rennet to 1/2 c cool water, Stir well into cultured milk
Hold temp at 85* for 30 min. or until clean break
Cut curd into ½ inch cubes, let rest for 5 min., stir 5 min., let rest 5min.
Allow curds to sink to the bottom of the pot
Remove 6 cups of whey and add 6 cups of 140* water, stir 10 min.
Allow curds to sink to the bottom of the pot
Remove whey to level with the surface of the curd
add enough 110* water to bring the level back up to where it was
Stir 20 min. let rest 10min.
Allow curds to sink to the bottom of the pot
Drain curd
Place curds into a lined press (I use PlyBan instead of cheese cloth in my press, I love it)
Press
20lbs 20 min
flip and rewrap (so it won’t stick to the cloth or plyban)
30lbs 30min
Flip/Rewrap
Overnight at 30lbs
Submerge cheese in brine overnight
Air dry for a few days, ripen at 53* and 85% humility for a week or more, then wax or seal with a food sealer and age for 6 weeks or longer.
Wednesday, June 29, 2011
Sourdough Sandwich Bread
This is a sufficiently sour loaf to satisfy your craving for rich, tangy sourdough. The oil and milk lend a lighter texture and even crumb pleasing when you prefer something a little less rustic.
Day 1
Combine 1 cup Rye Starter, 2 cups milk or buttermilk, 2 Tbsp sugar and 2 cups bread flour. Cover and ferment 8-12 hours.
Day 2
Add 5 cups bread flour ( enough to make a workable dough), 2 teaspoons instant yeast, 2 Tbsp salt, and 1/3 cup oil. Knead 7 minutes until smooth and satiny. Allow to rise about 2 hours. Divide dough and shape into three loaves. Allow to rise over the edges of the bread pan, about an hour. Bake at 375F for 35 minutes.
Monday, June 27, 2011
Rye Starter
Barm, levain, seed culture, chef, sourdough and rye starter are all nomenclature for this bubbly natural ferment. Unlike the yeasted starters, biga, poolish, pate fermentee this is a 100% natural ferment using only freshly ground rye and water. Rye has a knack for fermentation so there is no need to add yeast or sugar to get a stout long lasting starter. This powerhouse of ferment and flavor is able to quadruple in volume in 8 hours or less. With the warm summer days upon us the environment is ripe for fermenting!
Day 1
Combine 3.5 ounces warm water with 3.5 ounces rye flour fresh ground is best but store bought also works
Cover and let stand at room temp for 2 days until bubbly
Day 3
Stir 3.5 ounces of bread flour into the rye mixture
Cover and let stand at room temp for 2 days until bubbly
Day 5
Combine 2 ounces of rye started with 1.5 ounces of water and 3 ounces of bread flour
Cover and let stand at room temp for 2 days until bubbly
Day 7
Combine 2 ounces of rye started with 1.5 ounces of water and 3 ounces of bread flour
Cover and let stand at room temp for 1 day until bubbly
Day 8-10
Repeat above until starter is able to quadruple in size (1/4 cup starter rises to fill a 1 cup measuring cup) in 8 hours
Your starter is ready to use! If you need to put it to rest store it in the refrigerator. When you want to wake it up again just refresh as you did on Day 7 every 12 hours until starter is once again able to quadruple in size in 8 hours.
Sunday, June 26, 2011
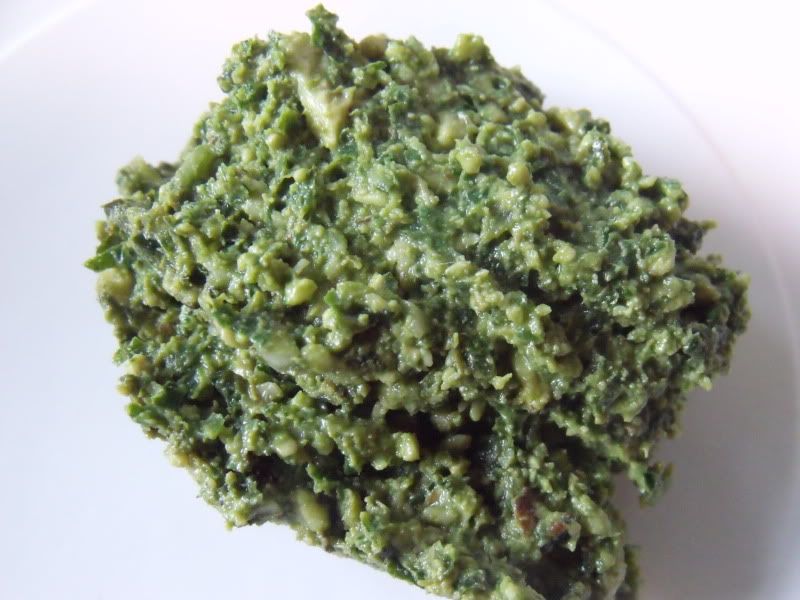
Basil Lime Pesto
Pesto is an entity unto itself, bringing personality and flair to nearly everything it touches. I always look forward to my first basil harvest. Pesto is my favorite summertime condiment. There are many versions and you don’t really need a recipe but I wanted to share mine in case you need a little inspiration. This makes quite a bit, and if you don’t have a large quantity of basil just reduce the recipe as needed.
Pesto will keep in the refrigerator for about a week, or you can freeze it to enjoy the taste of summer all winter. Not just for pasta, fish and chicken. Try Pesto on bread, Pizza, sandwiches, and burgers.
Ingredients:
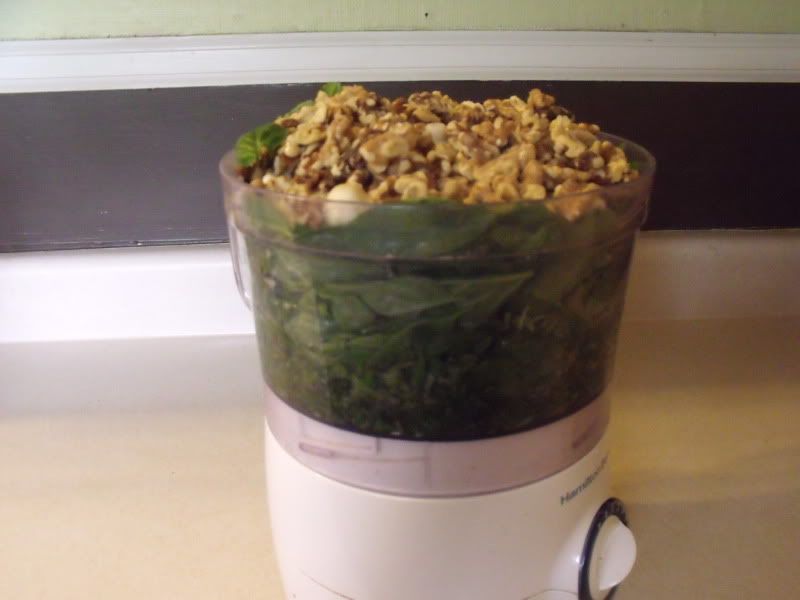
8 cups packed basil leaves
2 cup grated Parmesan cheese
2 cup walnuts (pine nuts or hazelnuts)
1 head garlic
Juice of 4 limes
3/4 cup Olive oil
Directions:
Snip and discard flowers and stems
Wash the basil and pat dry
Layer everything in a food processor starting with the basil
Mix until it forms a thick, smooth paste.
Thursday, June 23, 2011
Summer Ramblings
I've been neglecting my blog a bit lately. I've been distracted by beautiful summer days filled with children...
The sights, sounds and smells of childhood memories are carried on a summer breeze. Fairs and festivals, camps and cookouts, picnics and pools, bike rides and barbeques, sidewalk chalk and bubbles, fireflies, friends and windblown fields, homemade ice cream, all these things are the fabric of childhood. I want to soak it in moment by moment. All too soon the things of childhood are left behind and young adult responsibilities begin eek their way into our children's lives. I don't want to be in the kitchen or on the computer while that happens!
Thursday, June 16, 2011
Building Better Bread: Kneading
Drawings of busy bakeries along with carvings of people kneading unearthed at Giza show Egyptian bakers from 4000 BC kneading dough with their feet! Apparently, when they they used their hands, the bread remained hard and flat but with their feet it was soft and fluffy. The origins of machine kneading date back to1751 in Solignac, France. Which may be why French bakeries always seem to be so much more advanced the rest of the world. Hand kneading is an art and if you are able to achieve the results you want there is no reason to change your ways.
Simply put, the purpose of kneading is to develop the gluten and produce a light springy dough. It can be difficult not to incorporate too much flour into the dough when hand kneading. If you have trouble with the dough getting too heavy try mixing your dough for a few minutes in a mixer and allowing it to rest before turning it onto a board. I like to work with a very soft dough. I have often found, when using freshly ground grain that the dough might be too wet to handle in the beginning but if you knead it a bit in a mixer and give the grain some time to absorb the moisture you will have a consistency that is easy to work with.
As far as mixers go, with heavy baking I burned through many before I found one that will do a lovely job and hold up over time. I have used my Electrolux for over 10 years and it shows no sign of giving up. It is exceptionally strong with a huge 8 quart bowl that holds up to 7 pounds of flour. Even though it comes with a dough hook I only use the roller/scraper which creates a silky smooth elastic dough quickly.
Wednesday, June 15, 2011
String Cheese
The origins of string cheese are a little hazy. Perhaps in some rustic Italian villa, a mother, anxious to keep her child busy while she finished her cheese, pulled off a piece for him to work. After all the word Mozzare means to cut off.
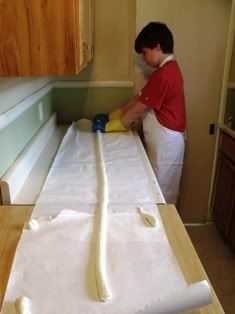
My kids love to make string cheese
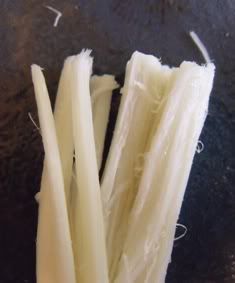
Once you have mastered Mozzarella there is no reason you can't move on to making string cheese. There is no need for a special recipe just follow the directions to the point of stretching. Once you have pulled the cheese just stretch and roll it out then cut into strips and brine it for a few hours.
Tuesday, June 14, 2011
Seven things about me...
I appreciate Marissa from beautiful Sand Holler Farm for acknowledging my fledgling blog with the Stylish Blogger Award! Please stop by and visit her gorgeous blog, you'll be glad you did!
It is said that true style is knowing who you are and what you want to say. In many ways my blog has a long way to go and I don't take it lightly that Marissa has faith in where I'm heading. The rules for the award are that I should post 7 new things about myself that haven’t been shared online and then pass the award on to 15 other bloggers. The first part is easy. Even though I have been participating on forums most people don't really know anything personal about me. For the second part I do have a couple of blogs that have drawn me in. Paula from This American Life is fabulous! Our love of nature, human culture and food have brought us together via blog world. You will love her whit and exciting adventures. Also, The Abby Farm. Join Suzy as she shares about her very dear and special family living on a farm estate built in 1890 by the brothers of Saint Benedict's Abbey.
Okay, since most people online know nothing about me anything goes, right?
1. I was born and raised in Alaska where I lived up until 16 years ago. My husband is from Kansas and after our first two babies were born we decided to move back here to live out our farm-home dream.
2. Four of my five children were born at home and two of them were water births. I love everything about homebirth. The sweet, peaceful setting of our own bedroom, the loving entrance directly into home and family life...
3. I also homeschool our children with a natural learning approach. I provide an educational environment with a small amount of formal bookwork and they are free to pursue their interests and learn everything they want to know.
4. I attended a nontraditional elementary school where there were no walls or age segregation. We called our 'teachers' by their first names. Instead of classes we had Family Groups. Instead of rows of desks we sat in a circle on the floor. Instead of assignments we had learning centers. At the beginning of the week we would have a conference with our Family Group Leader and make up a contract with what learning activities we would do. Then, at the end of the week we would check in and let them know what we thought about our week and what we learned.
5. When the kids were little we went for a couple of years without a car and rode bikes everywhere.
6. I have serious issues with driving in the city.
7. I do Capoeira (Brazilian martial arts), kickboxing, and Samurai sword fighting.
Monday, June 13, 2011
Honey Oat Bread
If you want to begin a farm life there is no better way to start than by baking bread. Over 21 years ago when I was a young wife, pregnant with our first baby, I began to imagine what kind of home I wanted for my family. I dreamed of children playing at my feet, cloth diapers hanging on the line, the soft clucking of chickens in the yard and the smell of fresh baked bread wafting from the kitchen. This Honey Oat Bread is the epitome of soft fluffy childhood sandwiches made with love in mama's kitchen. Nothing says 'home' like home made bread.
Ingredients
3 cups bread flour
3 cups whole wheat flour
1 cup rolled oats
2 cups milk, buttermilk or whey
1 cup warm water
1/3 cup honey
1/4 cup oil or melted butter
1 Tbsp salt
1 Tbsp sugar
2 Tbsp instant yeast
Directions
Combine 3 cups whole wheat flour with 2 cups buttermilk cover and set aside for a few hours or overnight.
Once the whole wheat has been soaked in the buttermilk, in a separate bowl, combine 1 Tbsp of sugar and 2 Tbsp of yeast with 1 cup of warm water. Stir to dissolve the yeast then let it stand until foamy. Add the buttermilk soaked wheat four and the remaining ingredients. Mix in an electric mixer for 7 minutes. Let rise 1 hour. Punch down, form into two loaves. Let rise over the top of the pan, about 30 minutes. Brush top with egg and sprinkle with oats. Bake at 375F for 35 minutes.
Sunday, June 12, 2011
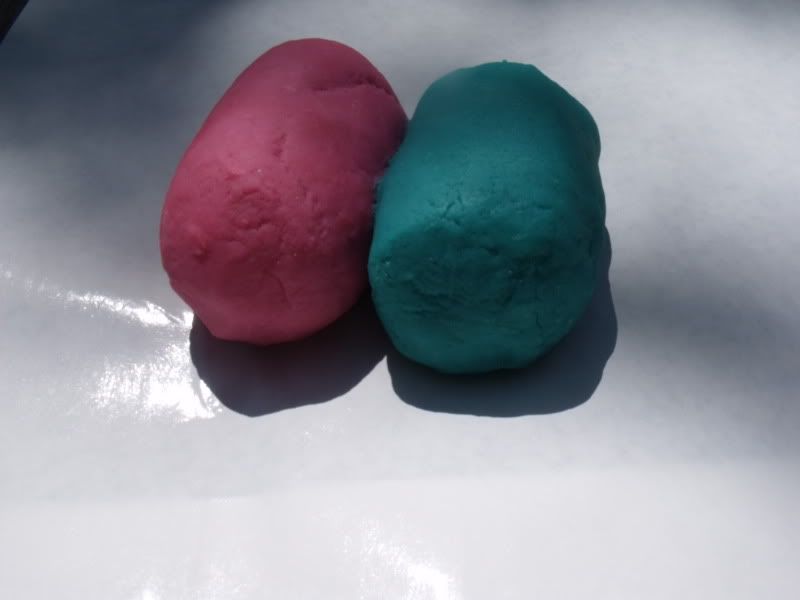
The Best Play-Dough Recipe in the World
What could be more fun on a sunny summer afternoon than play-dough? This recipe has been around forever and with good reason, it is simply the best.
Play Dough
1 cup flour
1 cup water
1/2 cup salt
1 Tbsp oil
1 tea cream of tarter
Gel type food color
Directions
Combine all ingredients in a small pot over medium heat. Stirring constantly, cook until it forms a ball. Knead lightly and allow to cool. Store in an air tight container or baggie.
Saturday, June 11, 2011
The Politics of Food
"It's beautiful! Good food production should be aesthetically and aromatically, sensually romantic".
~Joel Salatin as quoted in Farmageddon
Farmageddon is a new food related documentary revealing how the powerful food industries, through government control, suppress small sustainable farming. The other day I was talking with someone about raising pigs. They told me that because they love animals so much they could never pour love and attention into an animal that was going to be butchered. I find it puzzling that these same people wouldn't think twice about buying bacon from the supermarket without consideration of the deplorable, unnatural life those hogs lived before becoming food. And not only that, but by buying that bacon they are supporting the dismal life of factory raised animals when they could support small farmers who love their livestock. So, even though there is a long list of provocative food related documentaries already out there, we still have a long way to go in educating people about beautiful food from farm to table.Friday, June 10, 2011
Making a Garlic Braid
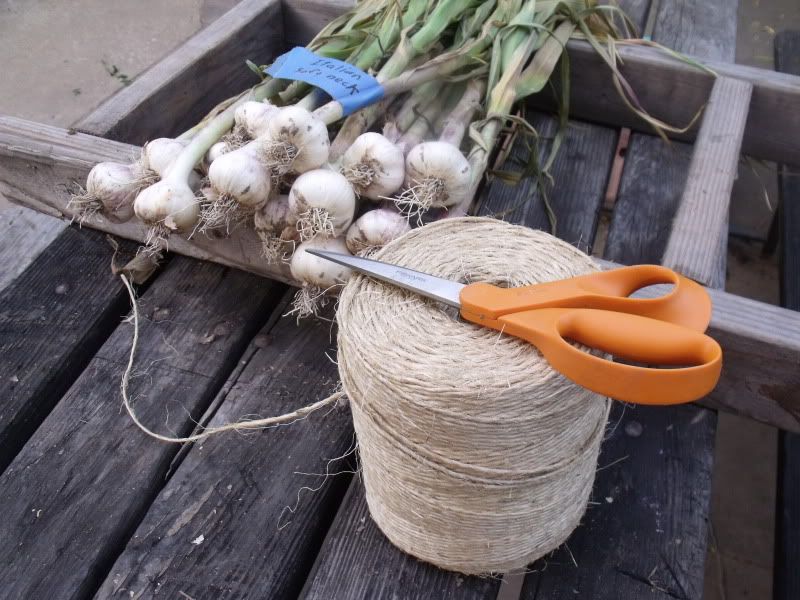
The Missouri River is due to flood June 14th. All of the people who live in the flood plain have been ordered to evacuate by this weekend. Some of our friends salvaged what they could from their gardens. This beautiful garlic was brought to me green because of the untimely harvest but it will still be wonderful. I decided to braid it to get it up out of the way to cure.
Scissors
Twine
Prepare to Braid
Brush dirt off garlic
Brush dirt off garlic
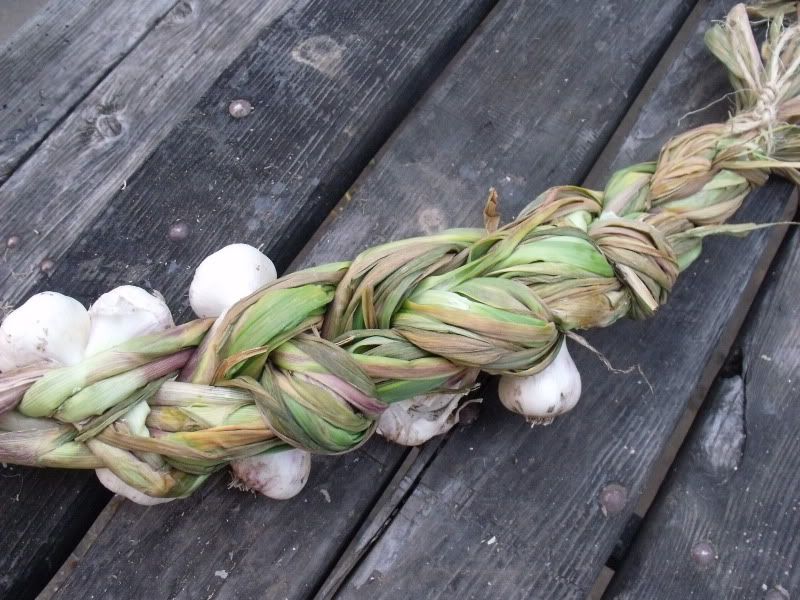
Braiding Instructions
1. Add a piece of garlic to the center –stem down the middle
2. Braid right strand to the center
3. Add Garlic to the right side - stem down the middle
4. Braid left strand to the center
5. Add Garlic to the left side - stem down the middle
6. Braid right strand to the center
Each braid section should contain two stems
Repeat From 1.
End with a garlic in the middle
Continue braiding stems
Thursday, June 9, 2011
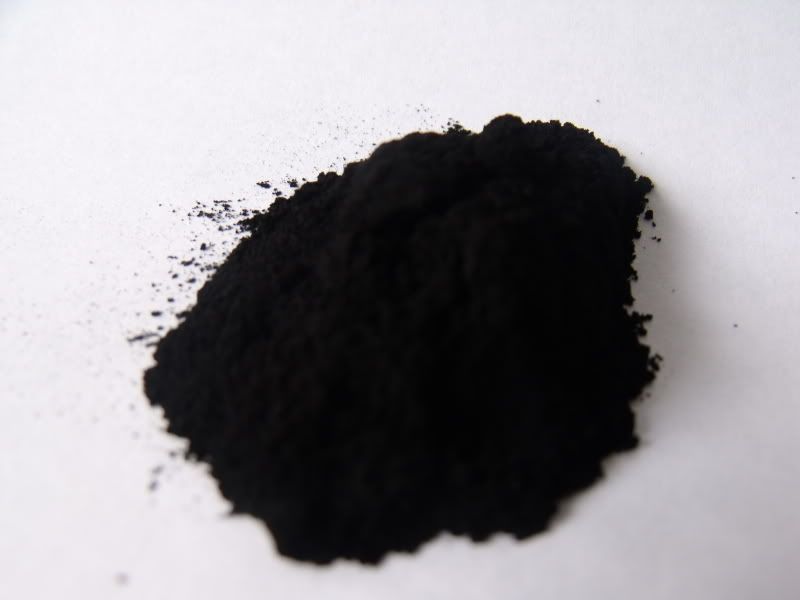
Activated Charcoal for Healing and Detoxification
I love it when I come across something that has so many uses it transcends to almost every area of my life. Who would have thought activated charcoal could be so important? Since ancient times carbon in the form of activated charcoal has been used for detoxification and healing. For people and animals alike this is a chosen remedy for all manner of ailments.
I first knew I needed to keep activated charcoal on hand in case one of my goats should eat a something poisonous. Charcoal absorbs and binds the toxins. Fortunately I haven't had to use it this way, but you should mix it as a drench with water and be sure to give the goat baking soda and b-complex afterwards to replenish beneficial rumen flora.
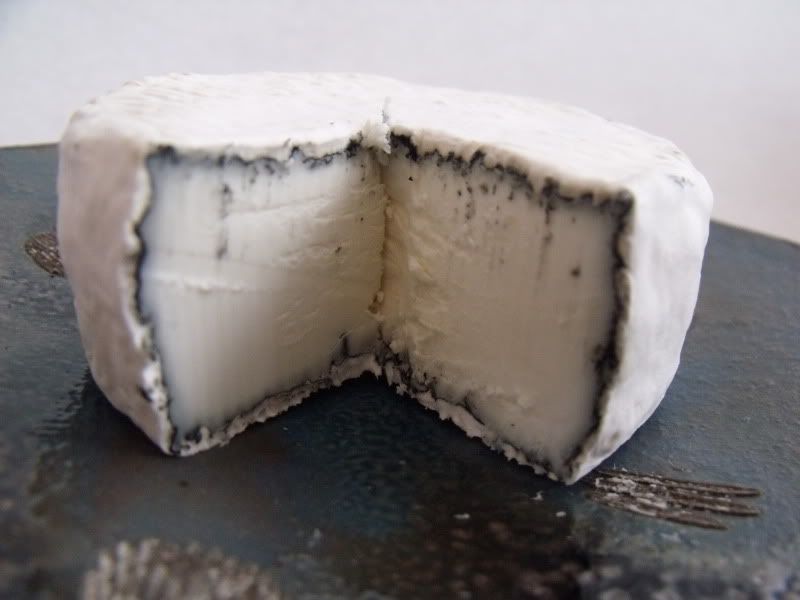
It was when I started working with soft mold ripened cheeses which called for ash that I started to get serious about charcoal. These cheeses were originally made with oak charcoal but today many artisans use activated charcoal because it is very pure and readily available. The role of the ash in cheese making is to lower the pH which develops flavor and allows the mold to grow properly. It is also beautiful!
From cheese making the activated charcoal soon found its way into my soap. With its deep black color and detoxifying properties I couldn't resist.
Even though I knew it could be taken internally, It had never crossed my mind to actually use it until my husband was coming down with a stomach flu. All the kids had been sick and he knew he was next. When he asked me if I had something he could take my first thought, burnt toast, brought the charcoal to mind. To my surprise he was willing to gulp down the mysterious black sludge. It worked, that evening he started to feel much better and he never did succumb to the flu. It can also be used for infected wounds, bites or stings topically mixed with just enough water to form a paste.
Wednesday, June 8, 2011
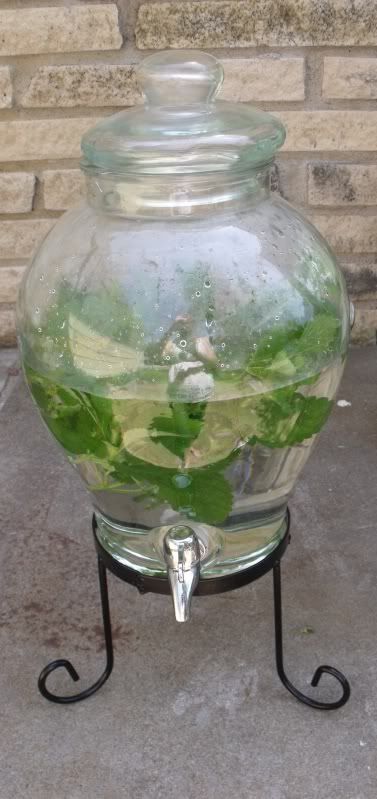
Lemon Balm Stevia Solar Infusion
Okay, so it's sun tea! Solar infusions are a wonderful way to extract flavor and medicinal properties from herbs. The long slow brewing method provides a tisane that is less acidic with a subtle flavor and aroma. Using a ratio of 2 tablespoons of fresh herbs per cup of purified water place glass jar in a warm sunny location for 10-48 hours.
I make mine with a variety of herbs but our favorite is lemon balm and stevia. The lemon balm has a strong bright lemon flavor and when complemented with the sweetness of the stevia it makes a delicious herbal lemonade.
Lemon Balm (Melissa Officinalis)
Lemony Goodness
Stevia (Stevia Rebaudiana)
A touch of sweetness
Monday, June 6, 2011
Soap Colorants: Mica
Micas can be tricky. Not all of them remain stable through saponification and some of them bleed. Also, they seem to come and go. The best mica I've ever used for soap, POP mica, has been discontinued from the manufacturer. Reds and greens seem to change constantly from batch to batch. Here are a few micas that worked out nicely.
This soap is made with neon blue, neon green and neon yellow,
For a softer shade this is pearl pink,
This is a swirl with neon pink used with a fragrance that turns the soap dark brown,
This one is neon yellow and tangerine POP,
Thursday, June 2, 2011
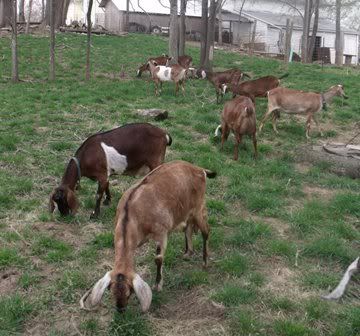
Milking Goats
I love a misty morning walk down to the goat barn. The clinking of my milk bucket, the soft bleating of the waiting goats, the sweet smell of hay and earth make me feel peaceful and happy.
Goats are intelligent, loving creatures with an eager to please disposition. They were among the first domesticated animals and their desire to develop a deep bond with the herd keeper is evident.
65% of the milk consumed worldwide if from goats. A well cared for, mature doe can easily produce over a gallon a day. Goat milk protein contains all the known essential amino acids, including a much higher content of medium chain fatty acids. It also contains A and B vitamins and minerals such as calcium, potassium, magnesium and phosphorus. The unique molecular structure of goat milk not only makes it healthy and easy to digest but it is also beneficial when applied topically. With its natural emollients, goat milk can relieve dryness and restore a supple softness to the skin. Goat milk nourishes the body inside and out.
While I milk my mind often drifts to the people all over the world, throughout history, who have sat down next to a goat to do the same thing in the same way and I feel as if this time honored tradition connects me, in a deeper way, to humanity.
Wednesday, June 1, 2011
Greek Basket Style Feta
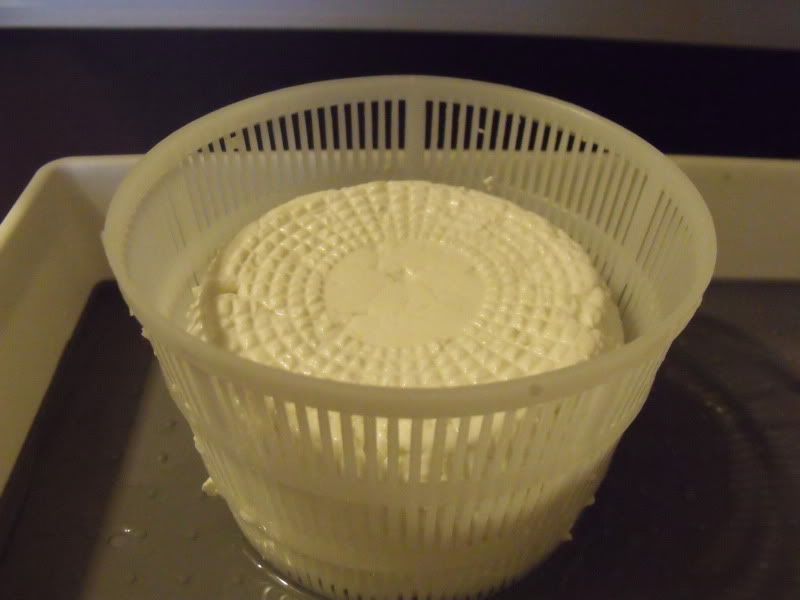
Feta rightfully falls into the Aegean Sea, soft brine preserved, class of cheeses. For centuries Feta has been made from the milk of goats and sheep that roam along the hillsides of the Balkans. Using baskets to drain and mold the cheese into wheels is as functional as it is beautiful. The process really hasn't changed much over the years. Modern cheese makers often add lipase to sharpen the flavor of the cheese. If you are using goat or sheep milk and are willing to allow time for aging you can achieve a wonderful complex flavor with strictly traditional methods.
FETA
Ingredients:
3-4 gallons raw goat milk
1/2 tsp. Mesophilic culture
1/2 tsp. Kid or Kid/Lamb Lipase powder (Optional)
1 tsp. Liquid rennet dissolved in 1/2 C. water
Kosher salt
Brine:
1/2 lb Kosher salt per 1/2 gallon of water (boiled and cooled to below room temp.)
1) Warm Milk to 86F Add the culture
2) Add the rennet and stir for 15 seconds
3) Cover and let set about 30-40 minutes, or until you get a clean break
4) Cut the curd into 1/2" pieces.
5) Let the curds rest for 10 minutes.
6) Stir the curd gently for 20 minutes
7) Let the curds rest for 5 minutes
8) Carefully scoop the curd into baskets
9) Allow curd to drain for 10 minutes remove from mold, flip the cheese over, replace it in the basket mold
10) Flip cheese and drain cheese every 15 minutes for an hour. Then flip and drain every hour for three hours. Allow cheese to set overnight at room temperature.
11) Remove cheese from baskets, salt both sides allow to cure at room temperature 2 days adding more salt and flipping every so often.
12) Store Feta in brine solution in the refrigerator. For long term storage adjust brine pH to 4.8-5.2 by adding citric acid, whey or vinegar
Feta draining in a basket mold
Subscribe to:
Comments (Atom)


